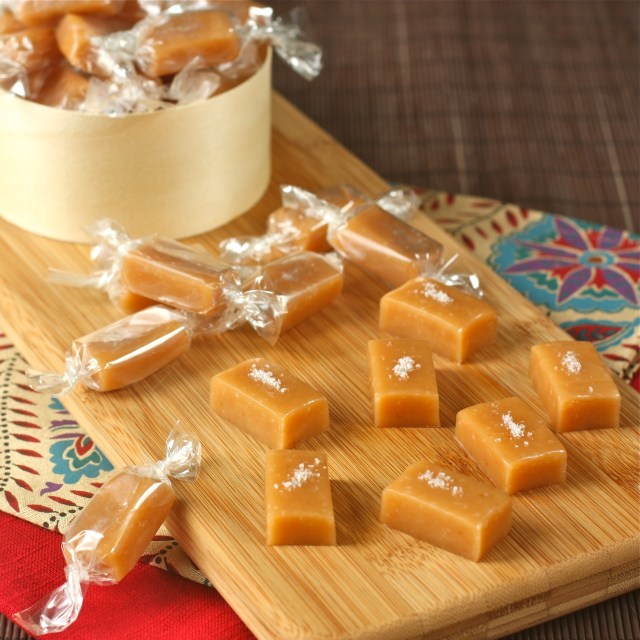
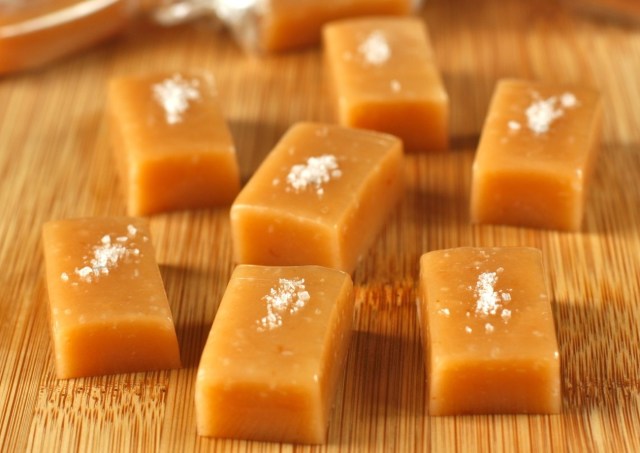
For someone with a such a sweet tooth, I am actually a little surprised that I don’t make candies and chocolates more often. Well, since Chris and I had such a great time making these caramels, that’s about to change. It was surprisingly simple to make, with one caveat: extra care is needed when cooking a sugar/cream mixture. It is lava-like and will stick to any exposed flesh if splattered, causing a nasty burn. That’s why I always have a big bowl of ice water nearby for emergencies.
We were a bit anxious to taste the caramel so we didn’t wait long enough for it to cool completely before trying it. As such, it was a little sticky and difficult to cut into the perfectly uniform pieces we were after. Also, it seemed as though the butter was not fully incorporated into the caramel, as there was a pool on the top. After a couple of attempts, we decided to call it quits for the night. Patience is a virtue…we reminded ourselves. Sure enough, by morning, the caramel hardened up a bit more and all the butter was absorbed. It was definitely much easier to cut.
I found pre-cut cellophane to wrap them in at restaurant supply store, but parchment paper cut into squares will work just as well.
Can these beauties be even better? Yes! Stay tuned for part 2 and I’ll show you.
Salted Butter Caramels
Yields about 100 – 120 pieces
Ingredients:
Vegetable oil
1 1/3 cups heavy cream
2 cups sugar
1/2 cup light corn syrup
1/3 cup honey
6 tablespoons unsalted butter, cubed
2 teaspoons vanilla paste or extract
2 teaspoons fleur de sel or sea salt (I accidentally put 3 teaspoons in and they were perfect for me)
additional fleur de sel or sea salt, for garnishing the finished caramels
Method:
Line an 8″ x 8″ baking pan with a piece of aluminum foil big enough to extend over the sides. Grease the foil lightly with vegetable oil using a paper towel to spread the oil evenly and thoroughly. Set aside.
In a 4-quart saucepan, bring the heavy cream to a boil. Add the sugar, corn syrup and honey and stir constantly with a wooden spoon or a heatproof rubber spatula until the mixture comes to a boil. Continue to cook, stirring frequently, until the mixture reaches 257 degrees F on a candy thermometer, approximately 20 to 30 minutes.
Remove the pan from the heat and carefully stir in the butter, vanilla and 2 teaspoons salt. Pour into the prepared pan and let cool completely before cutting. To cut, line a cutting board with waxed or parchment paper and coat the blade of a large chef’s knife with vegetable oil to prevent the caramel from sticking. Invert the caramel onto the cutting board; peel off the foil and invert again. Cut the caramel into 8 1-inch-wide strips; then cut each strip into 1/2-inch pieces. Top each piece with more salt.
Wrap with cello wrap or parchment paper.
Adapted from a recipe from the New York Times originally published on December 18, 2005.
© Daisy’s World, 2012. All rights reserved. Unauthorized use and/or duplication of this material without express and written permission from this blog’s author and/or owner is strictly prohibited. Excerpts and links may be used, provided that full and clear credit is given to Daisy’s World with appropriate and specific direction to the original content.


Wow, I loved these caramel candies….these look so inviting!
Oh DAISY! These are gorgeous! I CAN’T WAIT for part 2!
Pingback: candies and confections – part 2: moulded chocolates « daisy's world
i don’t make candy very often either
i tried to make caramels once, but they turned out terribly… yours, however, look fantastic!!!
Thanks, Katie. Maybe you should try making caramels again. This recipe was fairly easy.
daisy
Your caramels are so beautiful and so evenly cut — a pleasure to look at.
I love salted caramel! These look great — soft and chewy, but enough sugar crystallization to hold their shape when cut. 🙂
These look great, Daisy. Even better with the salt on top, they make them so interesting. I’ve never made caramels, but I really must at some point. Great wrapping 😀
They look gorgeous and perfectly made and cut! You could start an online salted butter caramel selling business with those. 😉 Thanks for sharing this wonderful recipe. I also love candy and all things sweet and would love to try my hands on this recipe.
You don’t make them more often because they’re dangerous! HAHA. At least that’s why I don’t. These look amazing.
You’re right, Joanne! They are dangerous. I took most of them to work, so at least I shared the calories with my co-workers.
daisy
Oh my goodness. I love caramels. Especially salty ones. But my husband hates them, so if I make this I’ll end up eating them all!
I think it’s safe to say that I love everything you make Daisy!!! These caramels looks so good! Enticing and addictive. Yummy.
Thank you, Tia! That’s very sweet of you to say.
daisy
My mum would love these sooooo much
I shall have to try this. I made carMel icing for a cake last night and I know it feels like forever when you are cooking it. Tho my recipe is one coffe mug whit sugar, one brown sugar a pint of ultra pasturized half and half, a stick of butter and vanilla, cooked to a soft ball, then the pan held in cold water and stired till you can hardly stir before spreading on the cake. Even then it wanted to run over the sides and I had to keep pulling I up again. It always takes over night to harden. But I shall have to try these! They look so delicious!
wow..these look delicious! *drool*
Lordy, here I am looking at how tight my clothes are and you post this delicious little number! One word. Yum!